
Guest Post: Pickled Pears & Canning Basics
Canning is a tried and true method for preserving harvests for months after picking. In this guest post, recipe developer and blogger Kolika Simmons shares water bath canning basics and a unique recipe for pickled Asian pears using Giving Grove fruit. If you enjoy this blog, consider subscribing to The Serving, Giving Grove’s quarterly newsletter, and visiting Kolika’s blog, Wanna B. Gourmade.
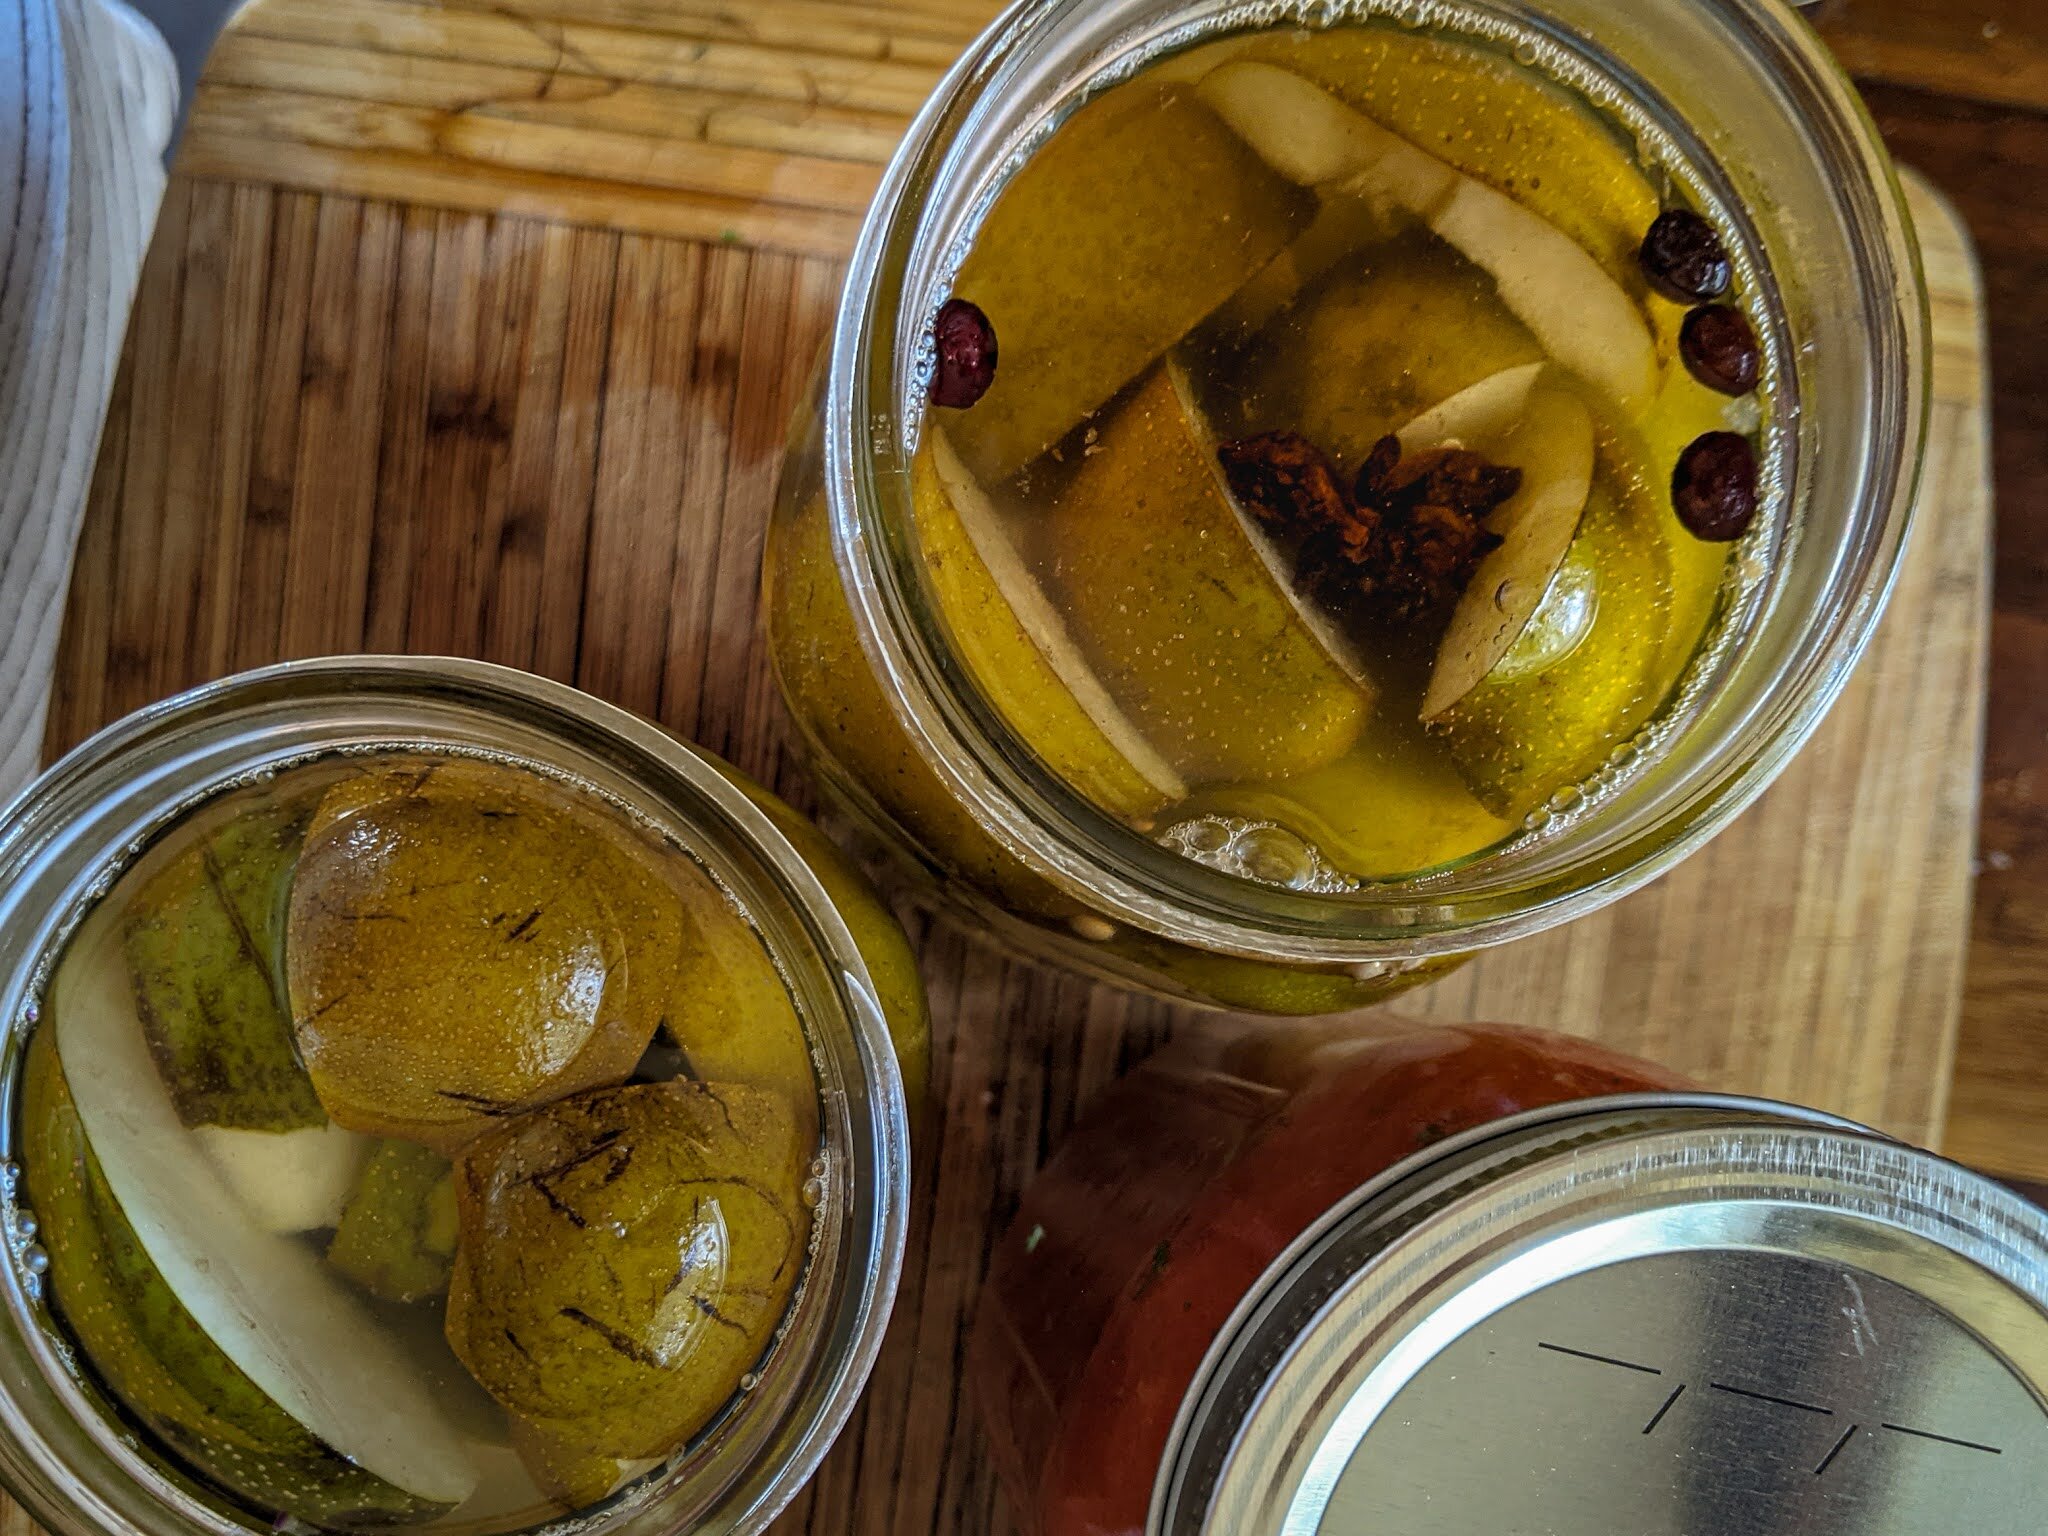
Photo courtesy of wannabgourmande.com
Contributed by Kolika Simmons
Not many have heard of pickled pears. In fact, everyone I've told about the plan for this week's blog has been both confused and intrigued by the concept. It's pretty funny for me to think about, especially because it's one of my favorite things to do with lots of pears. I don't necessarily enjoy eating pears, and the kind of pears I always seem to find are the ones better suited for cooking than eating straight off the tree. I'm sure that not many here in the States have even heard of the concept of pickled pears but I'm glad to be the one to introduce it to you. This, along with Upside Down Caramel Pear Cake, is one of my favorite things to do with the plethora of gorgeous Asian Pears that do so well out here in the Midwest.
Growing your own food is a wonderful joy that gives you a unique sense of self and confidence. It's highly relaxing to witness life from start to finish and to reap the benefits. I won't always be able to eat every single tomato that ripens, nor every strawberry or green bean or mint leaf when it's exactly ready, which is why teaching myself how to preserve the bounty of the harvest has been so important. Canning, drying, and freezing all of the food I've been able to produce has saved me not only money, but peace of mind, and that is something you cannot put a price on.
I love pickled pears because they're spicy, sour, and sweet, have a great texture, and are excellent on ice cream and cakes during the holidays. Of course, you can use it on a charcuterie board and have the jar open on the table for Thanksgiving or for the other fall and winter holidays, but these are just fine to eat out of the jar, or sliced up on a turkey sandwich. There are so many uses for pickled pears, and I hope you are curious enough to make some, too. The best part about pickling things is that you don't have to eat them straight away!
For this method, we'll be using a water bath canning method because I don't own a pressure cooker. I do have a large stockpot which I use for - you guessed it, stocks - and canning. You can find these on the cheap online or in many restaurant surplus stores. I'm using 32 oz quart mason jars for this project, and while you are more than welcome to use that size, you may use whichever size you have access to. This recipe makes enough brine for two of these jars, so please adjust accordingly.
Pickled Asian Pears- Recipe
Yields 2 32 oz/quart jars or 4 pint jars
~1 lb Asian pears washed thoroughly, quartered, and cored
1 c + 3 Tbsp 5% white vinegar
1 c white sugar
2 c water
2 tsp kosher salt
1 bay leaf
Per jar
1 star anise
10 white peppercorns
4 spiceberries or 2 allspice berries + 1 peel of orange zest, pith removed
For this project, you'll need (see photo): jars, jar lids & bands, jar lifter, lid lifter, funnel, headspace tool (bubble freer), and jar labels.
A few notes from a canner!
You can simply write the names of your items on the lids with a sharpie instead of using labels, and they will come off later with a bit of hand sanitizer. You can use tongs instead of a jar lifter in a pinch. You can use a pair of chopsticks as a bubble freer. A slotted spoon works just as well as a 'headspace tool' for your needs. I've literally never used a 'lid lifter' before so I see no reason you need it.
Other things that are nice to have:
A wood cutting board to rest your things on
A few clean tea towels
Some good music and a long phone charger

Step One: Sterilize Everything
First thing's first when it comes to pickling: sterilize everything. For you, this means get your big stockpot of water and bring it to a boil. I let my jars boil for about 3 minutes, as well as my lids and tops. I then leave them to dry on a wood cutting board. The important thing to remember with glass jars is that they're incredibly sturdy but extreme temperatures changes will harm or weaken them. This means you should never put a hot jar on a cold countertop or let a drop of cold water hit the steaming hot jars. This could result in a crack, break, or - even worse - a shatter. You don't want any of those things.

Courtesy of wannabgourmande.com
Step Two: Prepare the Pears
To prepare the pears, wash them thoroughly before quartering and coring them. Some of the pears I had were larger, so I cut them in wedges instead of quarters. You may also peel them but I personally don't see it as necessary. All you must do is pack as many pears into these clean and sterilized jars as possible while leaving your headspace. Headspace is just the little bit of air that must exist in every canning jar. Look for the little line where the jar's threads and the jar's body begins. This infographic chart (right) will help!
Step Three: Make the Brine
Now that you've packed your jars thoroughly, let's prepare the brine by combining the sugar, vinegar, water, salt, and the bay leaf in a pot and bringing it to a boil. Reduce to a simmer and cook for 5 minutes. Meanwhile, add your spices to each jar. Spiceberries are a gorgeous foraged item found in the Midwest of America and we haven't yet figured out how to cultivate them. [I'm a part of an incredible project with Prairie Birthday Farm to grow them and I'll hopefully be able to dry and sell them in the coming years.] If you can't get your hands on these lovely native spices, use allspice berries and orange zest in each jar. Just drop the spices in the tops of each jar you fill and call it square.
Step Four: Fill the Jars
When your brine is finished, remove the bay leaf and discard it. Pour the hot brine over the fruit until you get the proper amount of headspace and everything is covered appropriately. Tap down a bit with your slotted spoon and press the sides of the fruit gently with your chopstick or bubble freer tool to - you guessed it - get any air bubbles out. Wipe the tops and mouths of the jars well with a clean paper towel to make sure they are dry and add the lids. Screw on as tight as you can.
Step Five: Begin Canning
The canning of your pears happens by adding them to the boiling water using your tongs or jar lifting tool and letting them process for 40 minutes. When your timer goes off, remove your jars from the water bath and set them upon your wooden cutting board. Do not under any circumstances stick these in a cold area, especially the fridge, for at least 24 hours. What you'll want to do next is to move them to a place in the kitchen that they will be undisturbed and cover your jars with a clean tea towel. While you're cleaning up, don't be alarmed if you hear bubbling or popping sounds coming from the jars. This is the sound of air leaving and everything compressing and decompressing in the right way. This is all a good sign!
Step Six: Be Patient
The next day, give your jars a good wipe and label them accordingly. (As I mentioned earlier, you can forego the bought labels and simply write the names and dates of the items on the top of the jars with a permanent marker. Don't worry - they'll come off using hand sanitizer or rubbing alcohol when you're ready to reuse them!)
Store the jars in a cool, dark place until you're ready to eat. I recommend at least waiting a week to get some good pickling flavor in there, but this will stay good for at least 6 months in the cabinet. You'll know if things go bad if the seal on the jar pops, if it starts going cloudy, or if the jar starts leaking for any reason. Otherwise, keep it cool! I will admit, though, I've got pickled fruits, jams, and jellies in my cabinet from two years ago that are still good. Please refrigerate after opening, though! And do try to use within the same month.

Courtesy of wannabgourmade.com
On a personal note…
My husband and I will hopefully soon welcome our child in the late fall when all things in nature come to fruition, so I'm sure I'll have absolutely no time or energy to be able to prepare foods or go to the store while caring for a newborn. I realize that not every new mother has the ability to stay at home with their new babies for more than a few weeks, and I am so grateful that I'll be given more time than that to get to know my new little love. With a pantry that's full of the spring and summer's bounty, along with a full freezer, I'll know that I will have one less thing to worry about in the coming months. This is especially comforting for me to know since the Farmer's Almanac has been saying that the winter of 2021 will be one of the coldest and most bitter we've had in years.
What does this have to do with you? Nothing, really. I suppose I'm telling you this because I want to share with you a piece of my own situation, in case you relate, and so that you may better understand why a full pantry with homemade canned goods that you've created with your own two hands will be beneficial to you. I personally don't want to be going out to the store in the middle of a cold winter and I doubt that you will, either. Canned and pickled fruit doesn't always sound like the best thing ever, but it's going to provide you with much-needed vitamins during those colder months when you're going to want a reminder of the summer.
Thank you, Kolika, for contributing this recipe and step-by-step instructions to preserve our Giving Grove harvests. For more information about fruit varieties and ripening time, visit our harvest guide. To learn more about Kolika, visit her blog Wanna B. Gourmande.
If you would like information like this sent straight to your inbox, subscribe to The Serving, Giving Grove’s quarterly newsletter!